Inspired by this tweet
Saw this and had to share pic.twitter.com/NhH4JDpPGm
— Gary (@GaxZE) 1. Juli 2014
I re-made the picture in a higher resolution. It is based on a ad of Solid.
The picture is also available in German – use the language switch.

Inspired by this tweet
Saw this and had to share pic.twitter.com/NhH4JDpPGm
— Gary (@GaxZE) 1. Juli 2014
I re-made the picture in a higher resolution. It is based on a ad of Solid.
The picture is also available in German – use the language switch.
There were several Commits in the TextSecure-Browser-Plugin (see also the old blog) on GitHub.
I merged them with my fix for the message times and made a new package.
The most visible change is, that the conversations now happen in the main window as well (you might have to make it a bit broader).
Attention: This is still a developer’s version and use on the normal server as well as using it in daily live is discouraged. Anyways: I think beta testing is fun!
If you spot bugs, please consider reporting and/or fixing them and submit a pull request on the GitHub page.
You’ve been warned – download here: textsecure-dist-2015-08-29
*Updated 07.11.2015*
TextSecure already works pretty well on phone and desktop in a synced manner. But only with the developer builds.
If you trust me, just install the pre-compiled latest TextSecure Android App in your phone and TextSecure Browser Chrome Plugin in your browser. Both are not signed, so you have to allow insecure sources and so on. Then start the mobile app, register (which will generate a key). Run the browser plugin and scan the OR code to pair with the phone.
Since quite a while I was searching for an encrypted chat solution for my smart phone and desktop. It should be easy to use. Well encrypted. And history should be synced between the devices.
My hope was that a Jabber client for the smart phone finally gets message archiving working with OTR or another encryption. OTR will probably never work, because it does (additonally) not have offline capabilities. There were standardization efforts, but those timed out.
A friend pointed me to TextSecure by WhisperSystems. It is Free and Open Source. Works pretty well on the smartphone (both Android and iOS) in the same way like WhatsApp: It uses your phone number for identification, so it is easy to find your contacts. The only problem remaining: There is no finished desktop app for it.
But: There is a quite active development going on for the Google Chrome Plugin TextSecure in the Browser. In the readme they say you should not install it, but I did anyways 😉 Anyway it needs some steps
Basically you need the cutting edge App (not the one from the app store) and point the browser plugin to the production server.
No necessary anymore, the google play version is fine.
sed -i s/textsecure-service-staging/textsecure-service/ Gruntfile.js

sed -i s/textsecure-service-staging/textsecure-service/ js/background.js

sed -i s/textsecure-service-staging/textsecure-service/ js/libtextsecure.js

sed -i s/textsecure-service-staging/textsecure-service/ libtextsecure/api.jsThat’s it!
Happy secure chatting!
As a Web developer you often use a local webserver. You might create an own VHost for each project. The next step is to add a domain like mycustomer.local with the IP 127.0.0.1. This is done by adding a line to your /etc/hosts file.
If you do not want to add a new entry each time you create a new project to /etc/hosts, the is a simple way to add a wild card entry on Ubuntu.
This works, because current Ubuntu versions use the Network Manager which itself starts the local DNS server „dnsmasq“.
/etc/NetworkManager/dnsmasq.d with the contents:address=/.local/127.0.0.1# host foobar.local
foobar.local has address 127.0.0.1We have one (a bit old) Linksys / Cisco ADSL router of the type WAG160N. Recently we decided to set up MAC filtering (in addition to a WPA password of course). We only allow access to the WiFi after we know which MAC the person’s device has. The reason is that we have only a very narrow connection speed and want to be able to see if anybody is (unintentionally) using to much bandwidth – due example by automatic updates.
All was fine for some days until we tried to add another MAC address to the filter and got the message „The MAC address can not be the multicast address“. It was an address starting with „5C: …“ which does not seem to be a multicast address at all according to Wikipedia.

I digged into the webinterface and found that there is a JavaScript function isMacMulticast
function isMacMulticast(mac)

{

var mac1=mac.toUpperCase();

var byte=parseInt(mac1.substr(0,2));

if((byte&0x1)==0x1)//if lowest bit of first byte is 1, then it is multicast address.

return true;

else

return false;

}
While I think it shouldn’t it does return „true“ for the mac address starting with 5C – but the lowest bit of the hexadecimal value 5C is not 1! The should have used
byte=parseInt("0x" + mac1.substr(0,2));
Quickly I found a workaround for this problem.
Just open your browser’s developer’s console and enter
isMacMulticast = function(e) { return false; }
After this you can save the settings. There is no router-side validation at all.
I was wondering how to change the fields which a backend user can edit by clicking on „User John Doe“ in the backend.
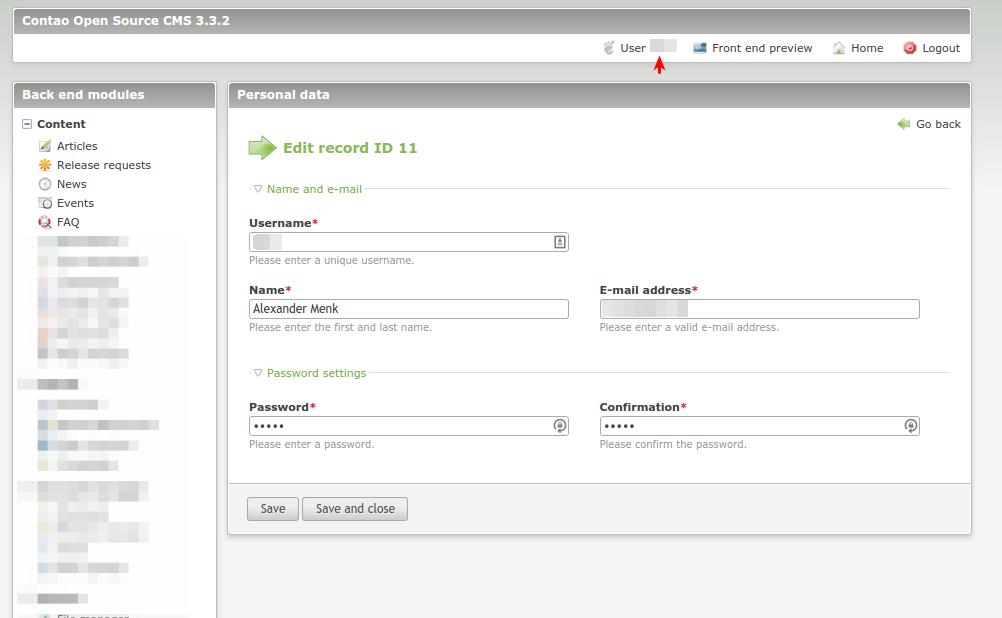
It’s simple.
Just create a new module (or use an existing one like mycompany_mycustomerlocal) and under dca/tl_user.php with the following palette definition:
$GLOBALS['TL_DCA']['tl_user']['palettes']['login'] = '{name_legend},username,' . 'name,email;{password_legend},password';
That is it.
I found this by digging into the code a system/modules/core/modules/ModuleUser.php:52
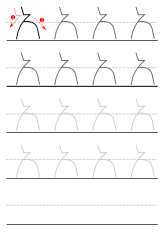
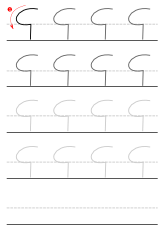
Today I made some papers for my daugther Anna to learn to write Ethiopic letters. Here they are. More will follow. Click to download:
On my Android phone I use Cyanogen Mod 11. Unfortunately the integrated picture taking app does not support Google’s Photo Sphere function which I like a lot.
That is why I installed Google Camera from Google Play. This comes with one disadvantage: The Google Camera does not allow choosing the storage path which I would like to set to the SD card which has more space.
I tried and learned a lot: First I was trying creating a symlink using the Terminal Emulator. Setting a symlink using the command ln -s /storage/sdcard1/DCIM/ /storage/emulated/legacy/DCIM is not working an gives me a „link failed Function not implemented“ error.
Finally I figured mount -o bind /storage/sdcard1/DCIM/ /storage/emulated/legacy/DCIM has the desired effect but how can I make this on every boot?
I thought of editing the fstab but now the Terminal Emulator was a bit hard to use so I Googled for SSHing to my phone and discovered the Android Debug tool. First I activated USB debugging by clicking seven times on the build number on the about screen to activate the developer mode which reveals the USB debugging option. We have to specify root permissions for ADB. On my Ubuntu computer I install using aptitude install android-tools-adb and after connecting my phone via USB I can execute adb shell to open a shell.
Back to the original problem, there is no /etc/fstab but a /etc/fstab.qcom. Unfortunately this file can not be edited. We can make it read-writeable using mount -o remount,rw / but now I figured that the changes are not persisted during a reboot.
Next I learned about the file /data/local/userinit.sh which is executed on each boot if it exists. I put
#!/system/bin/sh
mount -o bind /storage/sdcard1/DCIM/ /storage/emulated/legacy/DCIM
in it, but it did not work and using the logcat command I found that the mounting takes place to early:
I/sh ( 178): mount: No such file or directory
To make a long story short I finally found the folder mount app (needs root of course) which gives an easy GUI to move the folder and mount it on the next boot. Now my pictures are stored on the SD card.
The Contao Web CMS System provides the possibility to rewrite classes of the core or of 3rd party modules.
In case you want to publish your extension, this is not a suggested way because this can create conflicts if two installed modules try to rewrite the same class. But for local modules this is a valid method.
First of all you must ensure, that your module is loaded after the module you want to rewrite. You can assure this by giving your module a name which comes alphabetically after the name of the module to be rewritten. Or you can add a line
requires[] = "dlh_googlemaps"
to your autoload.ini. Digging into the code you find out that this require statement is evaluated in \Contao\ModuleLoader::scanAndResolve.
Now you simply have to add your class to the autoload.php with the same class name (without namespace prefix) as the class to be rewritten:
ClassLoader::addClasses(array
(
	'Mymodule\Googlemap' => 'system/modules/mymodule/classes/Googlemap.php',
));
The class loader uses the class_alias() PHP function to define an alias for the class name without the namespace. So now the class can be instantiated using \Googlemap.
Your Googlemap.php would look like this
namespace Mymodule;

class Googlemap extends \delahaye\googlemaps\Googlemap {
    public static function getMapData($intMap, $strFormat= '', $arrParams=false) {
        parent::getMapData($intMap, $strFormat, $arrParams);
        // your code
    }
}
If you set
$GLOBALS['TL_CONFIG']['debugMode'] = true;
in your localconfig.php, a debug area is displayed on the page’s bottom indicating which classes are aliased:

The method \Contao\ClassLoader::findClass() is responsible for searching the registered namespaces for the class. The static field ClassLoader::$namespaces contains the registered namespaces in reverse order of the loading order of the modules so the first match is picked.
There is one catch: if two or more of your modules use the same namespace, all of them have to be loaded before the module you want to overwrite (using the required-configuration mentioned above) . Otherwise the namespace will be listed in the wrong order as each namespace can be only registered once and the overwrite will not have an effect.
References:

